Showing posts with label Steal of the Week. Show all posts

Sunday, November 18, 2012

Steal of the Week: Churro Cheesecake

When the election was going on, I began to wonder if Facebook had any redeeming qualities anymore. I have a Twitter and a Pinterest, why did I need a news feed of emotionally charged stuff only sprinkled with updates of people I care about? Yet I soldiered on and wouldn't you know it, people post recipes on there too?!

Thank you Karen for sharing this recipe for churro cheesecake! I always have reduced-fat crescent rolls on hand as well as neufchatel cheese so I whipped this up super quick for my wine tasting/spa party! Delicious.
So good in fact, my chocolate obsessed hubby loved it!

Tuesday, October 2, 2012

Steal of the Week: Ancho-Glazed Salmon

I love it when a plan comes together! So that recipe I pinned to use with my expertly (ahem) prepared salmon?Fantastic! Simple ingredients in a spicy and sweet rub made delicious fish and sweet potatoes!

The fish cooked while the potatoes broiled and I quickly steamed some fresh broccoli to round out our meal. Hubby gave it two thumbs up! Now I just need to practice my fish mongering skills!

You can find the recipe here: Ancho-Glazed salmon

Thursday, July 19, 2012

Steal of the Week: Black Bean and Mango Salsa

A dear friend of mine came for a visit and of course I wanted to cook some yummy stuff for her! We have the same likes and when I saw that mangoes were on sale at the local grocery store for $1 a piece, I immediately thought about making mango salsa. I found a pretty good recipe in my trusty The America's Test Kitchen Family Cookbook ( I also recommend Best of America's Test Kitchen: The Year's Best Recipes, Equipment Reviews.) The fact that it also called for black beans and I was sold. Of course I made modifications as I always do. In this case I omitted the pineapple juice (I have NEVER had a mango salsa with pineapple juice)and replaced it with red wine vinegar and I omitted the jalapeno and replaced it with cayenne.


Black Bean and Mango Salsa
Ingredients
  • 1 - 15.5 oz can black beans, rinsed
  • 1 - mango, peeled, pitted, chopped fine
  • 1/2 red bell pepper, chopped fine
  • 1/4 cup minced red onion
  • 1/4 cup red wine vinegar
  • 2 tablespoons fresh lime juice
  • 2 tablespoons minced fresh cilantro
  • 1/2 teaspoon cumin
  • 1/2 teaspoon cayenne
  • To taste sugar, salt and pepper
Combine all of the ingredients, seasoning at the end with a little sugar (I probably used about 1/4 teaspoon) and fresh ground pepper and Kosher salt to taste. The result was sweet and spicy and delicious. I served it with the spicy grilled shrimp and basmati rice and the next day we were eating leftovers of it right out out of the bowl with tortilla chips!

Wednesday, May 23, 2012

Steal of the Week: Cake and Ice Cream Sandwiches

I am all for easy baking since baking is neither my strong suit nor something I am patient enough to practice on a regular basis. Baking is also challenging in the summer so imagine my delight when I came across this blog post for Cake Mix Waffles from a blog I recently began following: http://www.cometogetherkids.com/

What was even BETTER was the idea to make these delicious waffle shaped pieces of cake into cake and ice cream sandwiches! This was so incredibly easy and I tried it out on my good friend Ingrid and her kids to no complaints....and there was the quote form my step-daughter " I like these better than the ones we get from the store". So clearly....these are genius!

This could not be any simpler...favorite cake mix into waffle maker and voila:
Not all of them got made into sandwiches I will admit and my husband was already imaging the frosting options:
I used frozen vanilla yogurt as a healthier option than full fat ice cream and it worked great. I agree with Laura about adding chocolate chips being a great idea and Ingrid was dreaming up ideas of chocolate ganache. I look forward to making these again.

Wednesday, February 29, 2012

Steal of the Week: Chicken with Pepperoni Marinara Sauce

Every once in a while I come across a dish that is not only company worthy but SHARE-worthy. After I made Chicken with Pepperoni-Marinara Sauce I told anyone I came across (including my no-carb mother) about it. It was delicious and I cannot wait to make it again! Thanks to Cooking Light for another awesome recipe. It was so simple and made practically with ingredients most of us have on hand.

Here is part of my mise en place:
I used turkey pepperoni because that's what we always have on hand and the jarred minced garlic because, well I was in a hurry! This is already one of Cooking Light's 20-minute super fast suppers and I shortened the time even further!
Jarred sauce obviously is the trick to a super fast meal and again is a home staple. I used the olive oil and garlic flavor for this go round.
Using chicken cutlets like the recipe calls for is another huge time saver. I purchased a package specifically for this recipe but usually I make my own.
The finish in the oven really makes the dish, allowing the cheese to melt and brown. I only use 2% mozzarella and with no pasta, this is a pretty carb friendly dish.I had no fresh basil on hand but used the fresh parsley I had left over form another recipe. It really came out beautiful and the response from my husband was overwhelmingly positive. It is already on next month's menu!
I am looking forward to trying different sauces as we continue to tweak the dish and the basil will definitely be on hand next time!

Thursday, January 12, 2012

Steal of the Week: Kid-Tastic Pizzadillas

Now that I seem to have the monthly meal planning almost to a science, I am trying to work on developing a plan for lunches as well. This will prove to be a most daunting task in many respects, as both my husband and I work outside the home and have occasions where there will be impromptu lunch meetings, our son has his lunches included Monday thru Friday but needs lunch on the weekends and my 12 year-old step-daughter needs lunch at least once a week when she is with us and every other weekend. Whew! Writing that out it seems even more complicated!

I have already documented that often on weekends we do leftovers for lunch and my inability to cook small portions of anything also means there are meals in the freezer. But as we try to further improve our eating habits and I try not to bore myself or anyone else with a sandwich every day, I am trying out different ideas for lunch. I started small and simple with this recipe for Kid-tastic Pizzadillas from Cooking Light.

They only take a total of 15 minutes. I decided since I was packing them for work and school that instead of trying to send separate marinara, I was just going to sprinkle a little over the cheese and pepperoni. The key is not to use too much so there is no oozing. I used the whole wheat fat free tortillas and they worked great.

Once they cooled enough to handle, I cut them into wedges and packed them into reusable plastic sandwich containers. I popped mine int the fridge when I got to work and did a quick warm-up in the toaster oven at my office kitchen. My step-daughter kept them in her Pack-it lunch bag and just ate them out of the container. She thought they were great! of course me being me, I am dreaming up other fillings for me and the husband and letting the kids come up with ideas too. A fun and delicious way to start off trying lunch recipes! I will keep looking for new ideas but what do you do to keep lunches exciting and keep from eating out?

Sunday, December 11, 2011

Steal of the Week: Cheesy Meat Loaf Minis

This might look like a lot of ingredients...but I promise every single last one of them is worth it! Including the fresh breadcrumbs, which I made from an orphan slice of whet bread. And all of this (except the ground sirloin not pictured) was for another Cooking Light recipe that not only I, but the rest of my family got excited for: Cheesy Meat Loaf Minis
All of the ingredients come together VERY easy, and although with traditional meatloaf recipes I am always hesitant to make a "free form" loaf outside of a pan, the six mini-loaves the recipe called for were easy to make and retained their shape beautifully:
My family are HUGE meatloaf fans so the thought of them each getting their own loaf was highly attractive. I also followed the recipe to the letter, even using the ketchup which I am admittedly not the hugest fan of. However it really worked in the recipe, even as the topping the recipe calls for...as the final product clearly shows:
My one learning moment was probably that I didn't dice my cheese small enough, thus the excessive spillage in the pan. However, that also created a lot of cheesy goodness inside the loaf. Both husband and step-daughter had two and served with instant mashed potatoes (hey, Betty Crocker makes some good ones and a mid-week meal is hard enough!) and the ever popular corn, and you have a meal that hopefully brings back good childhood memories. 
I see a lot of potential in "gourmeting" these up a bit for company but in the meantime, we have another recipe tested and approved by my family. 

Tuesday, October 18, 2011

Steal of the Week: Chicken and Herb White Pizza

This month I tried something a little different when I planned for the month...I decided to concentrate on one source for my new recipes. I thought this might be a fun way of trying new things but also help me get through my pile of magazines! The recipe I stole this week is from by now what most of you should know is one of my favorite magazines: Cooking Light. The husband was especially interested in their Chicken and Herb White Pizza so I added it to the menu and went to work!

First of all, I always scoop up the pizza dough balls from my local Harris Teeter whenever they go on sale for 99 cents AND on Sunday's they usually mark down their rotisserie chickens $2 off. And since I also plan my menus based on ingredients...I already had the grated fresh pecorino Romano cheese too! The sauce was very easy and took no time to make. The only change I had to make was one of my own doing...how on earth was I out of fresh garlic? So in went garlic powder instead!
I will admit I am still having some difficulty with making a round of pizza dough! But the sauce still looked pretty yummy on it even if it was misshapen:
I followed the instructions to the letter, even ensuring I cooked it on the bottom rack. Anyone with a pizza stone know if that would make a difference? This picture in hindsight makes me laugh...looks like my tasty pizza is in jail!
Topped with parsley and chives from my very own herb garden (I didn't have fresh oregano and decided it didn't really need it) and the result was very good. Hubby suggested adding some crushed red pepper to the sauce (shocker) and the fresh garlic will definitely make a difference.
I think it will make a great appetizer pizza and I plan to try it with my own homemade dough...sometime soon!

Saturday, October 8, 2011

Steal of the Week: Mashed Sweet Potatoes

I have been making a conscious effort to shop seasonally more and more so much of this month's menu features produce that is plentiful (and thus cheaper!) this time of year. One of the fall's most popular produce items is a personal favorite of mine: sweet potatoes. I can rock a mean puree (if you are local and been able to watch Cooking with Passion on Cox 11 you saw that in Round 1 --or look for my hands and a stick blender in the promo here) or I always go the standard cook-like-a-baked-potato and dress in butter and cinnamon and sugar. This time I had cream cheese on hand and thought I'd give that a whirl in creating a simple mashed sweet potato side to go along with these beautiful marinated strips (the marinade was fresh squeezed lemon, fresh ginger, Worcestershire, ketchup and soy sauce) :
I ended up stumbling upon a super easy recipe for Creamy Mashed Sweet Potatoes courtesy of Kraft Recipes.    
And really it doesn't get any easier then peeled and cut sweet potatoes, chicken broth (I used the organic free range I had on hand), cream cheese (I as usual used neufchatel) and nutmeg (I saw no need for the almonds). The great thing about a stick blender is one pot cooking! The finished meal came together with the steaks beautiful grilled by my hubby:
Hubby was such a fan of the sweet potatoes he had to restrain himself from a THIRD helping! They were delicious and I am already thinking of making them for Thanksgiving in lieu of regular potatoes.

Monday, October 3, 2011

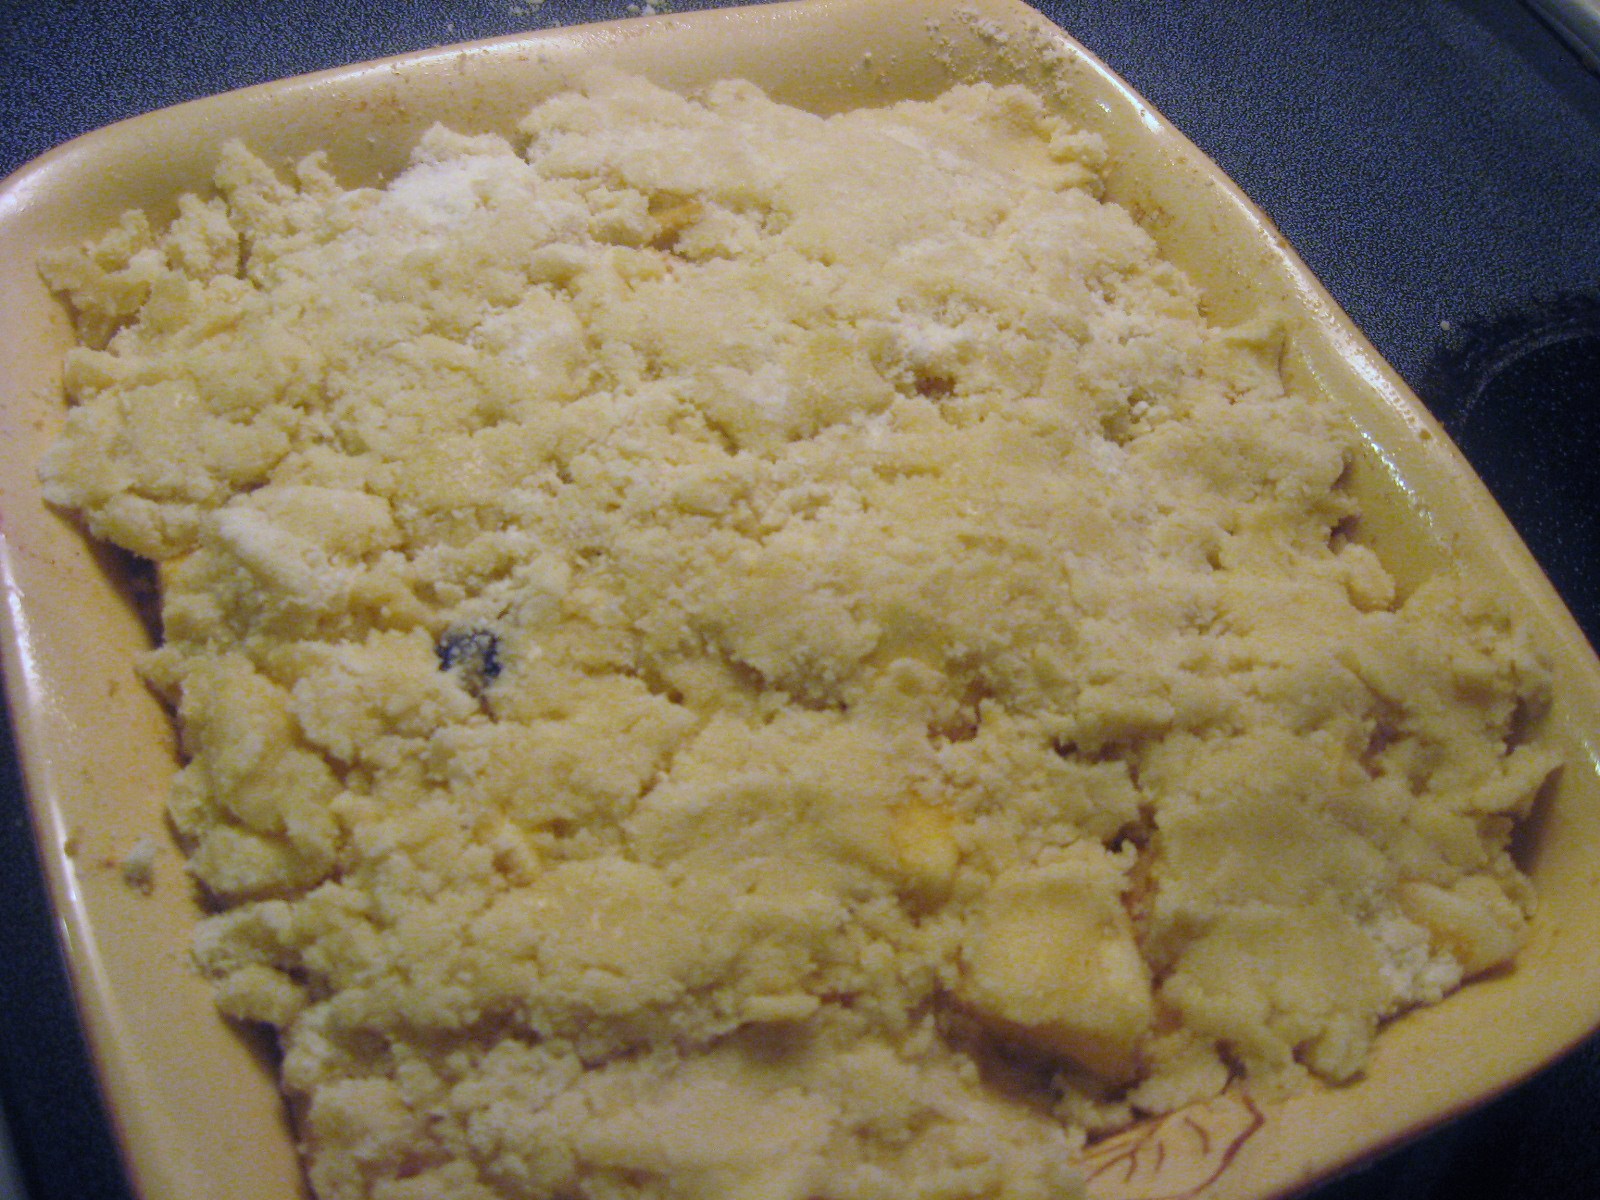
Steal of the Week + Meatless Monday: Apple and Blueberry Crumble

My dear friend Zack recently took a trip to the Shenandoah Valley and asked if I would be interested in having some apples from his adventure in apple picking. Actually, I am not sure if I allowed him to finish asking the question, instead interrupting enthusiastically to shout "Apples! I love apples, yes, please!". Once the apples arrived I immediately cut and ate one and quickly remembered why store bought apples are lame (well, okay to be fair store bought apples are fine but compared ot picked off the tree to table...not even close!)

The next question was, now with a bounty of apples, what to make with them? My favorite dessert next to pecan pie is apple pie but anyone who regularly follows this blog knows I am a novice (see also "not good experiences") at baking and while I am working on getting better at it, not sure if I am ready for a scratch pie. However, baking or no baking, I am pretty good using mixes to make practically anything so when BettyCrocker.com coincidentally sent me an e-mail with recommended recipes for apples, I found the recipe for Southern Apple Crumble. Of course, as is always the case I made my own substitutions and instead of oatmeal cookie mix I used sugar cookie mix and I decided to add a cup of blueberries that I had on hand.

The recipe was very easy...I rough chopped 3 of the largest apples I had and mixed those with the sugars, butter and cinnamon right in the dish I used and sprayed with cooking spray.
The next step is adding the cookie mix which was mixed with the stick of melted butter (I used unsalted reduced fat butter).
After 40 minutes at 300 degrees, you had the chopped pecans and then I baked it for another 15 minutes:
Admittedly I cut into it too soon after taking it out of the oven so it was a little liquidy at first but it smelled so fantastic and I was so excited to top it with ice cream:
DELICIOUS! My co-workers were the beneficiaries the next day since I don't like keeping something like this around the house for just me and the little boy (Hubby not a big cobbler fan) and it lasted about 45 minutes in our break room. I love oatmeal cookies and I can totally see how that was good in the original recipe but something about the sugar cookie topping just made it for me! Happy #MeatlessMonday !

Monday, September 5, 2011

Steal of the Week: Mexican Coleslaw for Meatless Monday-Update

Remember that Mexican coleslaw recipe? I decided to Cook Crook the recipe up a bit and amp the flavor. I decided to use my Chipotle infused extra virgin olive oil from Savor the Olive!
And for a recipe like this if you don't already have an angled measuring cup like this one, you should get one! So much easier to measure!
The flavor was fantastic using the spicier oil! I think it would be super easy to add a little spice on your own too! It holds up well in outdoor situations and it's light flavor doesn't overpower other dishes.
Pretty isn't it? Oh and P.S. I cheated....I used the bagged coleslaw mix!! This will be a potluck and picnic staple for years to come.

Monday, August 29, 2011

Steal of the Week: Mexican Coleslaw for Meatless Monday

Labor Day weekend is coming up and you may be thinking about a side you can bring to your upcoming cookout. Try this recipe from Jillian Michaels that was made for me by a friend one of my last pot-luck parties. It is a delicious low-fat and low-calorie coleslaw that beats the old mayo version in terms of freshness and taste! I'll be making it this weekend for my church's Labor Day cook-out!
Mexican Coleslaw
Recipe by Jillian Michaels
Ingredients
  • 6 cups cabbage very thinly sliced
  • 1 1/2 cups carrots peeled and grated
  • 1/3 cup cilantro chopped
  • 1/4 cup rice vinegar
  • 2 tablespoons extra virgin olive oil
  • 1/4 teaspoon salt
Cooking Directions
  1. Rinse cabbage and carrots thoroughly with cold water in colander and let drain 5 minutes (or use a salad spinner like I do!). 
  2. Whisk cilantro, vinegar, oil and salt in a large bowl. 
  3. Add cabbage and carrots. 
  4. Toss well to coat. 
  5. Once prepared, serve immediately or cover and refrigerate for up to 1 day. Toss again to refresh just before serving.
Happy Meatless Monday!

Thursday, August 4, 2011

Steal of the Week: Baked Mozzarella Bites

I am always on the lookout for healthy versions of my family's favorite foods. One of our guilty pleasures is mozzarella sticks. I have never bought them frozen at the grocery and made them at home but on occasion when we are at a restaurant that has them on the menu, we indulge. So I was very excited to receive my August Cooking Light magazine and find one of their Super Fast 20-Minute Cooking recipes was one for Baked Mozzarella Bites! I decided to whip them up as an appetizer one night when I was serving pasta for dinner.

Ingredients

  • 1/3 cup panko (Japanese breadcrumbs)
  • (1-ounce) sticks part-skim mozzarella string cheese
  • 3 tablespoons egg substitute
  • Cooking spray
  • 1/4 cup lower-sodium marinara sauce (such as McCutcheon's)

Preparation

  • 1. Preheat oven to 425°.
  • 2. Heat a medium skillet over medium heat. Add 1/3 cup panko to pan, and cook for 2 minutes or until toasted, stirring frequently. Remove from heat, and place the panko in a shallow dish.
  • 3. Cut mozzarella sticks into 1-inch pieces. Working with one piece at a time, dip cheese in egg substitute; dredge in panko. Place cheese on a baking sheet coated with cooking spray. Bake at 425° for 3 minutes or until the cheese is softened and thoroughly heated.
  • 4. Pour the marinara sauce into a microwave-safe bowl. Microwave at HIGH 1 minute or until thoroughly heated, stirring after 30 seconds. Serve with mozzarella pieces.
  • David Bonom, Cooking Light  AUGUST 2011
  • I used my usual Bertolli tomato sauce that I always have on hand for dipping and these were gobbled up in a minute! I am looking forward to making them again as the magazine suggests for an after-school snack. I also thought these would be a fun little garnish on a salad for us grown-ups although I ate my fair share of these too. 

Sunday, July 17, 2011

Steal of the Week: Balsamic Glazed Pork Chops

I mentioned that I would be working with an incredible 18-year aged balsamic vinegar this weekend so I went on a hunt for a recipe that heavily features the ingredient. Then I remembered that back when my husband and I were dating, I had made him a beautiful and tasty balsamic pork chop dish for a night I wanted to impress him by cooking for him (Guess it worked!). Therefore, I was delighted to find the recipe again (originally from Gourmet 2006) on Epicurious.com. Their recipe for balsamic-glazed pork chops was exactly how I remembered it!
Balsamic Glazed Pork Chops
  • 4 (3/4-inch-thick) center-cut pork chops (about 2 lb total)
  • 1 teaspoon salt
  • 1/2 teaspoon black pepper
  • 2 tablespoons olive oil
  • 6 oz small shallots (about 8), quartered and peeled, leaving root ends intact
  • 2/3 cup balsamic vinegar
  • 1 1/2 teaspoons sugar
Read More http://www.epicurious.com/recipes/food/views/Balsamic-Glazed-Pork-Chops-233982#ixzz1SMdQdAED

Pat pork dry and sprinkle with 1/2 teaspoon salt and 1/4 teaspoon pepper.
Heat oil in a 12-inch heavy skillet over moderately high heat until hot but not smoking, then cook pork (in 2 batches if necessary) along with shallots, turning pork over once and stirring shallots occasionally, until pork is browned and shallots are golden brown and tender, about 5 minutes total. Transfer pork with tongs to a plate (here's what mine looked like:)
and add vinegar, sugar, and remaining 1/2 teaspoon salt and 1/4 teaspoon pepper to shallots in skillet. Cook, stirring until sugar is dissolved and liquid is thickened slightly, about 1 minute.
Reduce heat to moderate, then return pork along with any juices accumulated on plate to skillet and turn 2 or 3 times to coat with sauce. Cook, turning over once, until pork is just cooked through, about 3 minutes total. Transfer pork to a platter and boil sauce until thickened and syrupy, 1 to 2 minutes. Pour sauce over pork.
Times like these make me wish there was a scratch and sniff for food pictures! The flavor is so incredible for such simple ingredients. My only slight misstep was I may have cooked the pork a little longer than I should have, not getting the true pink center I would usually want but they were still moist and delicious. I decided to continue to keep it simple and just served them with brown rice and edamame:
Definitely a dish that will impress!

Thursday, June 23, 2011

Steal of the Week: Meatball Lasagna (Neapoliton Style!)

Remember how I made French Toast for Father's Day? I also made a special dinner for dear hubby that night. He loves Italian food and I recently received a free copy of a Sorrento Cheese mini-cookbook of different lasagna recipes. (Thanks to A Frugal Chick for the original link to get the cookbook!) I asked him to pick a recipe and he went straight for the Meatball Lasagna (Neapoliton Style). So I went to work!

The recipe in the book calls for 4 cups of  basic tomato sauce and it provides the recipe:

2 cups sweet onion, chopped fine
4 cloves of garlic minced
1 medium carrot, chopped fine
3 Tbsp. extra virgin olive oil
28 oz. of crushed tomatoes
10 basil leaves, thinly sliced


I used my food processor to finely chop the carrot, garlic and onion. These were then sweated in the olive oil on low heat until sweet and very tender, about 30 minutes.
Next step was to add the tomatoes, raise heat to medium, bring to a simmer and cook for additional 15 minutes. Season with salt and pepper, add basil and remove from heat. Voila!

Now the recipe for the lasagna also calls for you to make your own meatballs! But they are easy and delicious and I think I will make again to use in something else! In fact, as a joke I made my husband his own little "amuse bouche" of one meatball, a dollop of the tomato sauce and a basil leaf! By the way, the basil was from my still thriving herb garden. Yep, I'm proud.

The building part of lasagna has always been my challenge. Dealing with those cooked noodles can be a pain, but this time now only did I use non-stick tongs, I did not make the mistake of draining the noodles and setting them aside to stick to one another as I have in the past! This is after the first layer:
And I know what you are thinking! The recipe was not a misprint...it actually calls for sliced hard-boiled eggs! Now before topping with cheese:
The other thing the recipe mentions is after topping with the cheese (I used 2% mozzarella by the way), to top the lasagna with parchment and then aluminium foil. Somehow I was out of parchment but knowing I needed something to prevent the cheese from sticking to the foil, I lightly sprayed it with Olive Oil Pam! This is what it looked like out of the oven:
Umm, yeah...I think I drooled a bit when I pulled it out. Actually I think I sang a song about how awesome I was! The final plate was amazing and it was loved most importantly by the Daddy and of course by the kids. It also made the "special for company" list so if I ever invite you over for dinner make sure you give me FOUR hours notice if you want it!