Thursday, March 31, 2011

Quick Meal: Steak Wrap

Leftover meat + sauteed onions + Italian dressing + 2 slices of Pepper Jack, wrapped in a tortilla:
I love leftovers!

Wednesday, March 30, 2011

Beef + Blue Cheese + Spinach = Yum

Like most people these days I am a little price conscious, and that is especially true when it comes to food. I refuse to pay full price for anything but at the same time I don’t compromise on quality. One area in which it is sometimes difficult to keep costs down, especially when you shop for quality, is meat.

In the winter months, I sometimes find it easier to watch my costs
 when it comes to meat because there are so many stews and slow-cooked meals for which a tougher and inexpensive cut of meat can be used. However, I recently came across and article on using inexpensive cuts of meat and I was reminded of how versatile those same cuts of meat can be in lighter meals.

So I tried an experiment. I purchased some sirloin tip steaks on sale the other day and set out to either find or create a recipe in which to use them. Dont let the name fool you sirloin is the name but not the cut as explained here: http://www.themeatsource.com/sirlointipsteak.html

The key with any tougher cut of meat is marinating. I decided I would whip up my own marinade based on experience with several different ones I have tried over the years. I still had fresh rosemary in the fridge and I love rosemary and beef together. So that finely chopped combined with ½ cup Worcestershire, 1 ½ tablespoons of spicy brown mustard, ½ cup of Pierces BBQ Sauce and about 2 tablespoons of olive oil made a pretty flavorful mixture. Poured over the meat in a Ziploc bag and refrigerated for over a day and a half.

When ready to cook, I removed the bag from the fridge and allowed it to rest about 30 minutes. I heated up my grill pan and brushed it with olive oil. I cooked each steak about 4 minutes on each side and allowed them to rest covered with foil while I prepared the rest of the meal.
I had the idea to serve the meat over wilted spinach and sprinkle everything with Amish blue cheese. So, using the same pan, I added a little more olive oil and sautéed a finely chopped clove of garlic for about 1 minute. I added my packaged spinach blend to the pan and sautéed it until it was just covered with olive oil and garlic and starting to shrink. I then sliced the steak at an angle and arranged the slices over a healthy serving of spinach. Topped with the blue cheese and voila:
A few notes: I like my meat rare to medium rare so my time reflects that temperature. The true test of doneness is using the hand method taught to me by a chef and shared over and over again among friends.

I personally eat blue cheese on practically anything so its often my go to. I actually think in this dish feta may have been a better choice since its milder flavor wouldn’t overwhelm the flavor of the meat. In the end, hubby asked for seconds,I still had leftover steakwhich will be showing up in my Philly cheese steak wraps!

Monday, March 28, 2011

Another Cook Crook Steal: Crepes!

My local Harris Teeter was having a Buy 1 Get 2 free special on strawberries and I love strawberries in desserts. It also happened to be Super Double Coupons and thanks to The Krazy Coupon Lady, I scored a $1 off (which would double to $2 off) coupon for my favorite indulgence: Nutella

If you have never had Nutella I caution you against its addictive properties…that is if you like chocolate and hazelnut. I have a very good friend who makes a fabulous cookie topped with the stuff and my celebrity chef crush Fabio Viviani has a fantastic recipe for Nutella biscuits on his website. But, because I had those awesome strawberries, I wanted to use them too.

Enter one of my favorite dessert options: crepes. Granted, I have never made a crepe to this point but I have eaten my fair share and have enjoyed a Nutella and strawberry one at restaurants in the past. So why not give it a whirl and the next thing I know, the search was on for a crepe recipe. The recipes I had in my cookbooks were pretty complicated and also called for whole milk, real butter etc., so I let Google do its thing and found this recipe for low-fat crepes.

I do not own a crepe pan (or an 8-inch non-stick skillet for that matter) so I decided to use my trusty 10-inch and just make the crepes a little larger than what was suggested in the recipe. The recipe made exactly two large crêpes. The first one came out a little light but my second attempt was perfection! 

Upon removal from the pan I spread about 1 ½ tablespoon of Nutella inside and topped with sliced strawberries.
I folded it over and topped with Cool Whip Free and even got a little fancy with a strawberry garnish. Deliciousness!
I can't wait to try other fillings now that I have a crepe recipe I like. In the meantime, I'll be ordering the individual serving packs of Nutella to satisfy my next craving!

Sunday, March 27, 2011

Steal of the Week: Chicken Parmesan Burgers

Once again Cooking Light comes through for me with an awesome recipe my husband and I loved!

This month's Reader Recipe was Chicken Parmesan Burgers. I asked hubby if he'd be interested and he agreed to give it a try...he ate two!

The recipe is also here and I cook crooked it as usual. First you will notice that it calls for 3 different fresh herbs: thyme, rosemary and basil. This was difficult to accomplish on two fronts. 1) because I have yet to start my own herb garden due to fear and the longest winter ever and 2) grocery stores are apparently having difficulty stocking fresh herbs (possible due to my same reasons). I always have dried thyme on hand, so that left me with rosemary and basil. The grocery store DID have rosemary but no basil....but they did have this:
This may in fact be the best invention I have ever discovered! Fresh basil in a squeeze tube? Are you kidding me? I was so excited I think the hub unit questioned my sanity. It's not cheap ($3.99 for tube) but it will now be a staple in my house.

I also was unsuccessful getting ciabatta rolls but the bakery did have some very nice, fresh baked kaiser rolls.

I had already decided to double the recipe knowing using just a half pound of ground chicken was pretty crazy. The final ingredient to reconcile was the marinara sauce. If you are a regular reader, you know my husband always asks for more spice. So, instead of straight marinara, I used Arrabiata sauce.

A few tips I can pass along. The mixture will be very wet and very sticky. You have to work fast with the making of the patties and the skillet has to be HOT. Here's mine after they were flipped and before they went in the oven:
Be very careful flipping them as more than once I thought I could feel them wanting to come apart. 

The rubbing of the cut garlic on the toasted bread may seem like a silly step but it does make a difference. And because I didn't have fresh basil and instead used a small amount of the basil blend from the tube to spread on both sides of the bread, the garlic added a lovely flavor.

The finished product had wonderful flavor, still very light and very satisfying. Hubby suggested (and got with his second sandwich) a little sauce on the side to dip in!


Thursday, March 24, 2011

Cook Crook Creation: Taco Casserole

So what do you do when you have already thawed out a pound of ground beef for taco pie and dinner plans are scrapped because you are stuck at work past 6PM? Well, use it the next night of course, but my dilemma was what to make. Hubby suggested tacos but I wanted something more exciting. I remembered seeing a chicken enchilada casserole recipe in a recent Cooking Light so why not a healthy taco casserole?

I reviewed the enchilada casserole recipe and this Mexican one here and came up with the recipe below. My husbands reaction: “light and delicious
I love getting it right first time out of the gate! 

1 pound Lean ground beef (I use 93/7)
I small onion diced
8 oz of frozen corn
1 red pepper, diced
1 can of tomatoes and green chilies, drained
Taco seasoning amount needed for 1 pound of meat (1 packet or in the case of McCormick ¼ cup)
2 cups of salsa, divided (you can use all of one kind or do like I did use 1 cup tomato and 1 cup salsa verde)
12 corn tortillas
2 cups 2% Colby and Monterey jack cheese (or your favorite cheese blend), divided

Preheat oven to 350 degrees.

In a large skillet, cook and crumble the ground beef on medium-hi heat until browned. Remove to a plate lined with paper towels to drain. A small amount of fat should remain in the pan. If you do not use as lean as ground beef as I do, you may have more so drain it out of the pan until just enough to sauté the vegetables remains.

Add the onion and pepper to the pan and sauté about 5 minutes. Add the corn and cook another 5 minutes. Doesn’t it look pretty?
Add the tomatoes and green chilies and cook another 2-3 minutes. Add the ground beef back to the pan and add the taco seasoning. Be sure to mix the ingredients well in order to incorporate the seasoning and cook another 5 minutes before removing from the heat and setting aside.
Spread one cup of salsa on the bottom of a 9x13 pan. Layer 6 corn tortillas over the salsa. I found it easier to put the two tortillas on each end of the pan before adding the ones in the center to ensure they were evenly spaced. Spread ½ the meat and vegetable mixture over the tortillas. Sprinkle with one cup of the cheese.
For the next layer, start with salsa again. At this stage it is easier to dollop the salsa strategically across the pan. Add the final 6 tortillas, then the rest of the meat and top with the remaining cheese. Bake for 20 minutes.
You could certainly spice this dish up with the addition of jalapeños to the vegetables and/or higher heats of salsa. I also think ground turkey or shredded chicken would make a great meat substitution and if you are a fan of beans, you could add that as a layer. You can also experiment with a variety of cheeses depending on your preference.


Beef and Tortilla Casserole on Foodista

Wednesday, March 23, 2011

Steal of the Week: Slow-Cooker Meat Sauce

I LOVE my slow-cooker/Crock-Pot as is probably apparent if you read this blog and I am always looking for meals to prepare using it. With family in the town over the weekend, being able to cook for several people is also an advantage.


Enter my trusty Cooking-Light magazinehttp://www.assoc-amazon.com/e/ir?t=thec068-20&l=btl&camp=213689&creative=392969&o=1&a=B002PXVZW2 and it’s feature on slow-cooker recipes. In it, I saw a fantastic recipe for meat sauce and with my sister-in-law due to run a marathon the following day, a pasta dish would be welcome for the night before.

The original recipe is here. As usual, I made a few modifications based on what I had on hand and what flavors I knew the crowd would like. I substituted a pound of lean ground beef (93/7) for the ground sirloin and ground turkey for the hot Italian sausage. To make up for the loss of heat, I added an extra ½ teaspoon of red pepper flake while the meat was cooking. I used my food processor to process the carrots and onions and I also added celery as well. I also used regular canned tomatoes instead of no-salt added ones and consequently only used ½ tablespoon of kosher salt. One of those cans of tomatoes was the Hunt’s Diced Tomatoes with Roasted Garlic…everyone in the family is a huge garlic lover so I was liking the idea of the additional garlic flavor. Finally, I used whole wheat thin spaghetti to serve it over.

So, other than hubby noticing the olives and picking them out, the sauce was delicious (and the olives added nice texture and flavor and were not olive-tasting at all!). I think this one will be a must-make for potlucks and to take to people’s homes recipe…when I am not serving it at home for my family of course!

Monday, March 21, 2011

Quick Recipes: Garlic Bread and Croutons

One of the staples on our monthly menu is Chicken Caesar Salad. I marinate chicken breasts and either indoor or outdoor grill them, slice into strips and serve over a bed of torn romaine hearts tossed with Ken's Steakhouse Light Caesar Dressing and grated Parmesan. My husband loves croutons, so there is usually a bag of low-fat or fat free ones in the house for him because I don't usually use them on my salad and I also try to minimize carbs where I can.

However, once in a while I make my own croutons. Especially when there is bread in the house like this:
When this is in the house, I make my own croutons,  I eat them and I enjoy them!

The recipe is simple and I got the basic instructions from The Great American Test Kitchen Family Cookbook. They emphasize the key to good croutons is using regular olive oil, cutting the bread into uniform pieces and being sure to season them well. But first, we start with leftover bread!

The bread we purchased from Baker's Crust was used to make garlic bread to go with the pasta and meat sauce I made. The roasted garlic bread that Baker's Crust makes has whole cloves of garlic inside. To make it into bread for dinner, first I sliced the bread almost all the way through, leaving the bottom intact so the loaf would stay together. I sauteed three minced pieces in olive oil for 1 minute and then melted in 1/2 a stick of butter blend. I added 1/2 tablespoon of Italian seasoning and then poured over the cut loaf. I covered it in foil and baked in a 400 oven for 15 minutes. 

Now to the leftovers, we had about a half loaf left that I kept refrigerated since it had been buttered. The bread was already seasoned and garlic so I simply tossed it in a bowl with about 3 tablespoons of olive oil and 1/2 cup of Parmesan cheese. Put in a 350 oven for 20 minutes until the bread is golden brown:
Making your own croutons is dangerous though....you never want to eat bagged ones again!http://www.bakerscrust.com/

Saturday, March 19, 2011

Steal of the Week: Chicken Penne Casserole

A huge thanks to Kalyn's Kitchen once again for a great recipe! With family in town and 3 people needing to carb up before their 8K run, this was a family friendly and tasty choice.
http://kalynskitchen.blogspot.com/2006/03/chicken-penne-casserolesophie-cooks-in.html
My modifications were simple:
I precut my chicken into bite sized pieces. I heated a small amount of olive oil in a large non-stick skillet and cooked 5 cloves of minced garlic about 1 minute before adding the chicken. I sprinkled about a tablespoon of poultry seasoning over the chicken while I sauteed it. Then I used the chicken as the recipe indicates.

I also used Campbell's Cream of Chicken soup as she suggests, but I used the 98% Fat free, Healthy Request. The final change was just using two 7oz packages of 2% Kraft shredded mozzarella, one package for each layer.
A HUGE hit!

Wednesday, March 16, 2011

Fajitas

The menu called for Chicken Caesar salad, a quick, healthy and easy meal that is perfect for a Monday. I arrive home from work and find my two defrosted chicken breasts...but alas no lettuce. Now what?
Well, it just so happened that a good friend had just returned from a trip to San Antonio bearing gifts, specifically fajita seasoning and pico de gallo. We always have corn and flour tortillas on hand, I knew we had onions and I located a green pepper....so fajitas it became!

Fajitas are actually a popular dinner in our house. Sometimes I plan for them on the menu when I find a good price on skirt steak or leftover steak combined with a grilled chicken breast will make a good fajitas meal. I have never used a seasoning mix for my fajitas though. I have made them simply using taco seasoning and marinating the meat in a lime vinaigrette dressing. I have followed recipes that call for Italian dressing like this one. I have used chili powder, fresh lime juice, garlic and cumin. Sometimes, I use an indoor grill. Sometimes hubby takes the meat outside and other times I just saute the meat in a pan.Regardless of the marinade, I always reserve as a cooking liquid for the vegetables. I also season the veggies with a little extra of whatever dry seasoning I am using.

So here I am faced with a canister of  
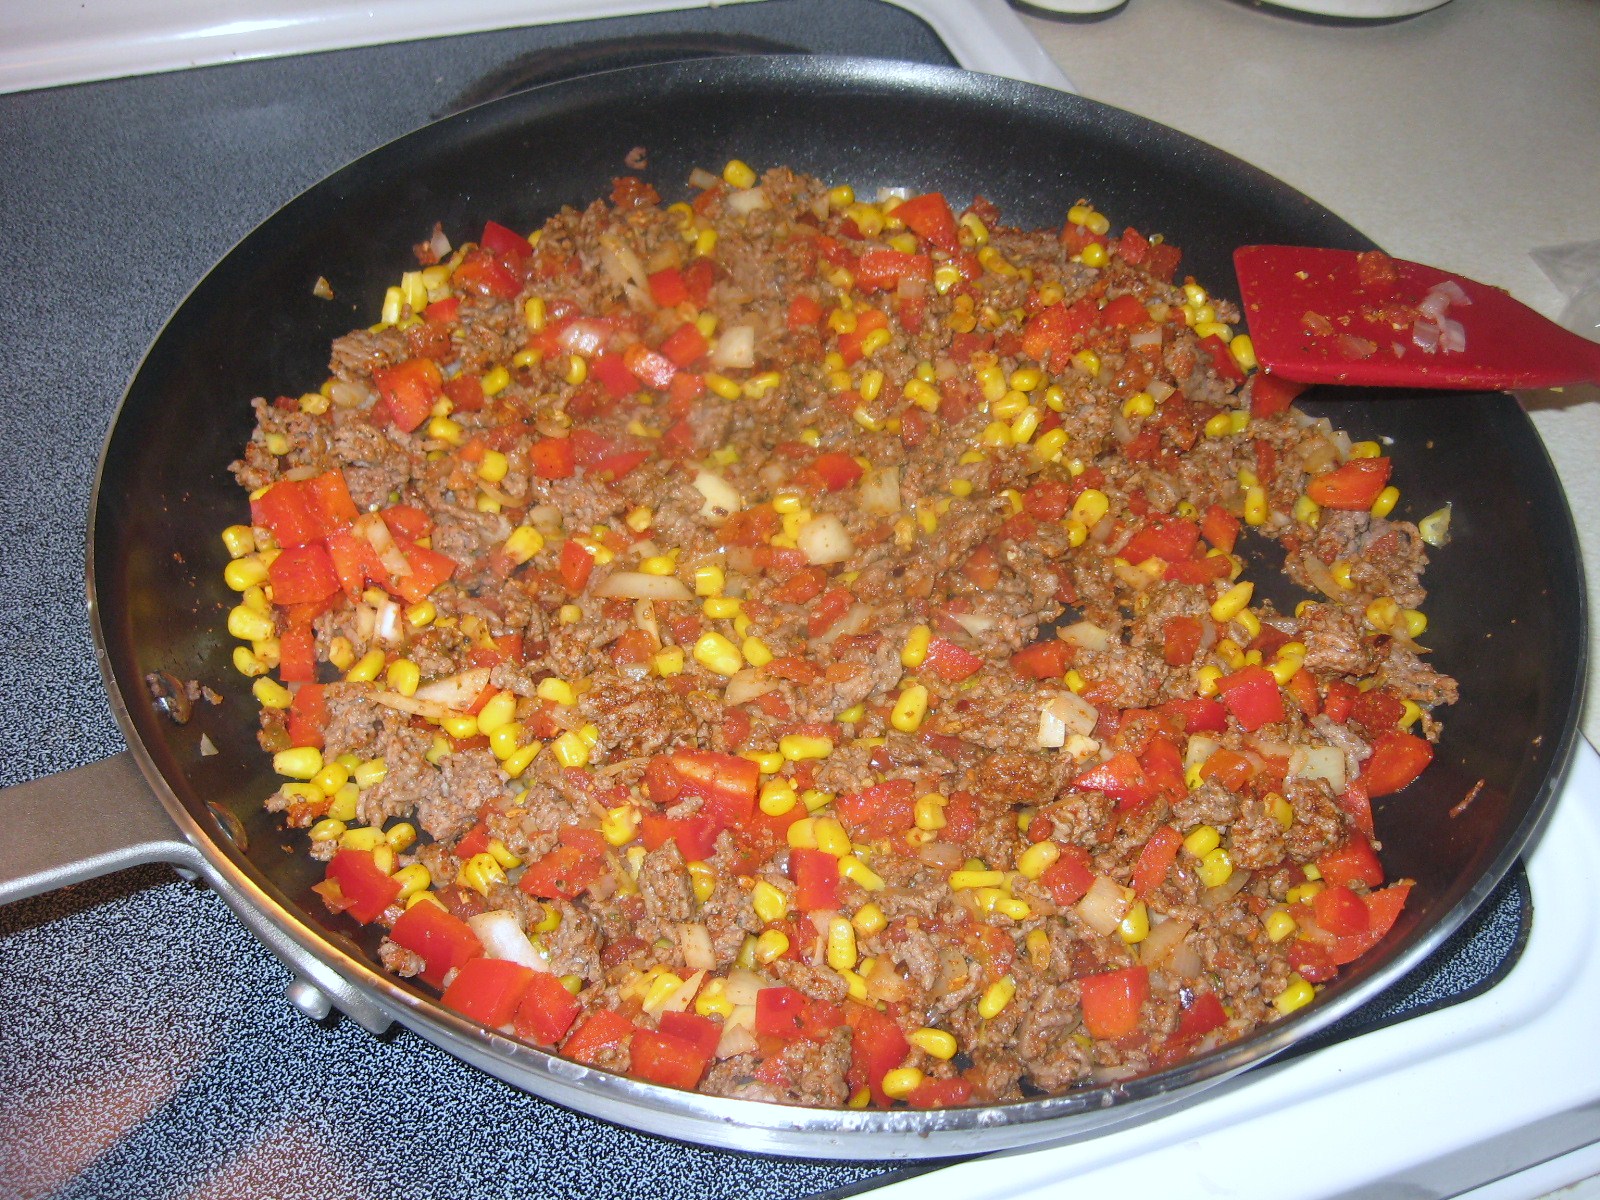
fajita seasoning I have never used. I open it and it has an amazing flavor and the instructions on the canister simply say to marinate the meat in the seasoning. I decide to go ahead and cut the two breasts into strips and then add a good amount of seasoning to the sliced chicken in a Ziploc bag. Hubby wasn't do home for another hour so in the fridge it went. I also went ahead and sliced my peppers and onions too.

When I was ready to cook, I heated some vegetable oil on medium-hi heat and added the chicken. I browned it well and removed from the pan. Then I added the green peppers and onions to the leftover oil. I added a little more seasoning and sauteed the vegetables for a few minutes before adding the chicken back to the pan.

While the chicken finished cooking and the vegetables softened, I heated the tortillas in a 325 oven for 10 minutes. By the time the tortillas were done, it was time to serve the fajitas.

I served them with pico de gallo, salsa, sour cream and shredded Mexican blend cheese. The seasoning was awesome and no extra liquid was needed. The only upgrade I will make is to squeeze a little fresh lime juice last minute of cooking!

Sunday, March 13, 2011

Appetizer Alert: Asparagus Wrapped in Prosciutto Improvised

I love making appetizers and consequently I love having a reason to make lots of little bites and dips and such. Usually it revolves around some sort of sporting event when I am not making appetizers to entertain. On a particular evening, with our dinner plans no longer possible due to a very obstinate preschooler, I decided it would be fun to make snacks for me and the hubby while he...umm we...watched college basketball. We had gone grocery shopping that day and there was fresh asparagus on sale as well as prepackaged prosciutto that was in the deli.

In a cooking class several months ago, we had made prosciutto and puff pastry wrapped asparagus. I made them for my family over the holidays with just the prosciutto, no puff pastry, much like the recipe found on Food Network. So that evening I set about making prosciutto wrapped asparagus. Imagine my surprise when I opened the prepackaged prosciutto to find 6 slices of said meat. So now what?

Well, conveniently we had also purchased some deli baked ham that day and because I knew the ham would not have the salt and fat properties of the prosciutto to cook the way I wanted, I decided to improvise and add crescent rolls. Below is the result....and they were gone in a flash!
If I made them again with the ham for company, I would personally add a little spicy mustard before wrapping them in crescents. One can of crescents did 20 pieces of asparagus with still some dough left over (and I probably still used more dough on each one than necessary). Same principle as pigs in a blanket, just cut the dough into the strips. I cooked everything at 375 degrees for 13 minutes. Just be aware that the prosciutto only asparagus will put off a little oil when cooked so in the future I wouldn't cook them on the same pan.

Saturday, March 12, 2011

Steal of the Week: Chicken Pizzaiola

Dinner out plans got cancelled so I was quickly trying to find a dish I could whip up for just hubby and I. Once again, The America's Test Kitchen Family Cookbook comes to the rescue! The recipe below is directly from the book. I had two chicken breasts so I just eyeballed the amount of ingredients and cooked in a smaller dish. They suggest the amount of sauce in the recipe is enough for up to SIX chicken breasts so keep in mind if cooking for the family. This recipe was a huge hit...but no pictures because we were two hungry folks!

Chicken Pizzaiola

3 cups any type of tomato sauce (I used a spicy sauce)
4 boneless, skinless chicken breasts (6-8 oz. each) trimmed
salt and pepper
1 cup grated Parmesan cheese
1 cup shredded mozarella
1/2 cup pepperoni, sliced thin (Book suggests you can use any pizza topping you like)

Heat oven to 450 degrees with oven rack at the middle position. Spread the tomato sauce in a 9x13-inch baking dish.

Pat the chicken dry with paper towels and season with salt and pepper. Spread Parmesan in a shallow dish, then coat the chicken with the Parmesan. Lay the chicken on top of the tomato sauce. Bake for 15 minutes.

Sprinkle the mozzarella and pepperoni over the chicken. Increase the oven temperature to 475 degrees and continue to bake until the cheese melts and the chicken registers 160 degrees on an instant read thermometer (anywhere from 5-10 minutes longer).

It is suggested to serve with pasta. Husband had rotini....I had broccoli!

Friday, March 11, 2011

Idea Thievery: Chicken Enchiladas

If you are a regular reader you know I have already stated my love for the nacho and if you know me personally you know I have mad love for Mexican foodFor the past few months I have been working on a chicken enchiladas recipe. Like most things I cook I look for a fair amount of simplicity, ingredients that I can go low fat on and ingredients that aren’t objectionable to anyone in my household.

So in looking for the best recipe to work from, I did what I always do. First I started with the physical cookbooks I have on hand. One of my go-to books was a gift from a dear friend and fellow cook: The America's Test Kitchen Family CookbookThey have a recipe for simple chicken enchiladas but there were a few issues with the recipe: the inclusion of heavy cream and the making of a traditional “red enchilada sauce. My dear husband is not a member of the red enchilada sauce fan club so I needed to find a variation on the recipe that was on the creamier side of enchilada sauces.

Enter my go-to website: Allrecipes.com They had a recipe that was pretty straightforward and simple and involved a few convenience ingredients like canned soup. In this case, they recommended cream of mushroom soup. That was going to happen either because husband does not do mushroomsOF ANY KIND. Even teeny, tiny mushrooms or mushroom-ish flavor was not going to fly. The all recipes version also calls for flour tortillas. One of the things I liked about the Americas Test Kitchen recipe was the use of corn tortillas. I like their flavor AND corn tortillas are the healthier option. 

So I experimented a few times, using sour cream like Allrecipes.com suggested and then trying light whipping cream. I experimented with tomatoes, tomato sauce, onions and chiles in different combinations. Then, I made up my mind to try one more version using the remains of the finally cooked roast chicken. The below recipe was in my mind a huge success and the only recommendation I got from hubby? A little more heat. Now THAT is an easy fix!

Cook Crook Chicken Enchiladas
1 can fat free cream of chicken soup
1 10oz. can of diced tomatoes and green chiles UNDRAINED
1 tablespoon taco seasoning
½ block light cream cheese
1 15oz can tomato sauce
2 cups cooked shredded chicken
2 cups reduced-fat Mexican blend cheese - divided
Corn tortillas

Preheat oven to 400.

In a sauce pan combine on medium heat the soup, tomatoes and chiles, taco seasoning, cream cheese,  and tomato sauce and heat until the ingredients are well incorporated and warm.
Remove the sauce from the heat and pour about 1 cup of the sauce into a bowl. Add the chickenand 1 cup of the cheese to the bowl of sauce and combine well.

Spray a large casserole or baking dish with cooking spray. Place the corn tortillas on a microwave safe plate, cover with plastic wrap and microwave for 50 seconds. (This is a tip I got from America’s Test Kitchen on rolling corn tortillas.) Working quickly with the still warm tortillas, place 1/4 to 1/3 cup of the chicken mixture in the center of each tortilla and tightly roll. I tend to stuff my tortillas pretty full so the amount of filling is truly a personal preference. The only trick is not to stuff them to the point they cannot be tightly rolled. I did find that I needed to reheat the last few tortillas to keep them pliable and easy to roll.

Place the rolled tortillas seam side down in the baking dish. Make sure to place them gently butsnugly up against each other. I ended up with a total of 12 rolled tortillas in my 9x11 baking dish. Carefully pour the sauce that remains in the pot over the rolled tortillas being sure to cover them evenly and completely. Sprinkle the remaining cup of cheese evenly over the sauced tortillas:
Cover tightly with foil and bake for 20 minutes. Remove the foil and bake for another 5-10 minutes or until cheese is melted and the sauce is bubbly.
Let stand for 5 minutes before serving.
The dish can easily be heated up with the addition of chili powder, jalapeños or a spicy taco seasoning. You can of course use 100% cheese instead of reduced fat as well. I am excited to have a recipe I can call mine and look forward to making them again to share with friends.

Thursday, March 10, 2011

Mac n' Cheese with "Stolen" Sauce: Cooking with Kids Update

I had mentioned in my recent Cooking with Kids post that the Rachel Ray recipe we used produced a lot of cheese sauce. I had already decided that the sauce would make for a great impromptu macaroni and cheese so thats exactly what we did.

I reheated the sauce on low in a saucepan, adding a little more milk to thin it out. To the sauce I also added a teaspoon of red pepper flake, fresh ground pepper and about a teaspoon of garlic salt. Next, I boiled about ¾ of a box of whole wheat elbow-shaped pasta to just al dente (about 1 minute less than the recommended cooking time).
 
After draining the pasta, I added it to a deep casserole dish that I had sprayed with cooking spray. I poured in the heated and melted cheese sauce and combined it well with the pasta. I topped it with whole wheat bread crumbs and put it in the oven for 15 minutes at 450 degrees.
 
This was the side dish for my less than successful roast chicken but every member of the family ate it and enjoyed what my son calls “noodle mac n’ cheese”. The only future upgrade is to amp up the cheese flavor a little more as the additional milk did lessen the cheese flavor. However, not a bad way to use one recipe for two dishes!

Wednesday, March 9, 2011

My Cooking Kryptonite: Roast Chicken

I have a confession...I hate raw whole chicken. I have no issues with chicken pieces but something about an entire chicken makes me nauseous. Whether it's the whole "removing the neck and giblets" part or the fact that it still looks like an animal, cooking a whole bird is enough to make me a vegetarian.

Perhaps this is why I always have issues roasting chicken. I have no explanation other than the chicken senses my disdain and decides to mock me by refusing to cook. I have never overcooked a chicken but boy have I undercooked one, and as recently as this past Sunday.

I have expounded how much I love leftover roast chicken but chose to not until today share the saga that is me roasting a chicken. (This may also be why we are big grocery store rotisserie chicken fans). But as I believe you never give up when it comes to cooking, I had noticed that whole chickens were on sale and had scooped one up with the intention of roasting it Sunday and using the leftovers for chicken enchiladas.

I turned to my trusty new issue of Cooking Light magazine and decided to try out their feature on how to roast a chicken. Here were step by step illustrated instructions and the rub they had suggested sounded fantastic. So I followed the instructions step-by-step and set the temperature as indicated. Because I am especially paranoid, I even kept the chicken in longer (about 10 minutes) at each temperature. I inserted my meat thermometer, saw 165 degrees and pulled it out of the oven:
Looks lovely right?

I let it rest and began to carve. The breast meat was so white and moist and then the blade went deeper and........

I thankfully took no pictures of the remaining bloody carnage. I was crestfallen...especially since it was already 5:30PM and my family was ready for dinner. So back into the oven it went and I played the game of "is it ready" for another 20 minutes. Finally, I cut off the cooked breast for the family and put the rest of the chicken back into the oven.

Fast forward to a conversation with my mom. I was telling her about how roast chicken is my cooking kryptonite and she said so matter-of-fact, "Roast chicken is a breeze. You slow roast it at 325 degrees until the legs can be gently wiggled and the juices run clear. A 4-pound chicken should take an hour and 15 to an hour and 20 minutes."

And I am reminded again that when all else fails in the kitchen, I should just call my mother.

Oh, and apparently I need a new meat thermometer.